Showing posts with label woodworking. Show all posts

Saturday, April 16, 2016

Simple 2x4 step stool

It has been a while since I posted a project.  And reality is that the winter months are not conducive to woodworking when your shop is either the backyard, driveway, or garage.  And work and life have a way of getting in the way. (ok, and some of my hobby time has been taken by a new hobby, I remember telling someone a year ago that I did not have any room for one of those.)  So, here is one of the easiest things in the world, a step stool made from 2x4.


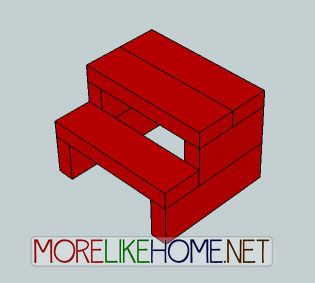
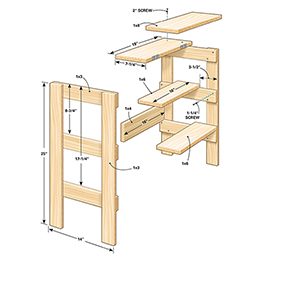
Diagram of 2x4 step stool
2x4 step stool diagram

What brought this on is that a step stool made by my father-in-law collapsed while we were dealing with a tantrum.  While the shock of the collapse did end the tantrum, we now did not have a step stool for the kids in the upstairs bathroom (which is needed so they can use the sink on their own).  And, to be honest, I had a few purchases over the past few months that needed a workout.

I used a design described in the blog MoreLikeHome.Net that built a stool from a single 2x4 (I think that I've seen this design in response to a contest of what can you make from a single 8' 2x4).  So, went to our favorite Home Depot to get a 2x4 while my son was at a birthday party not too far away.
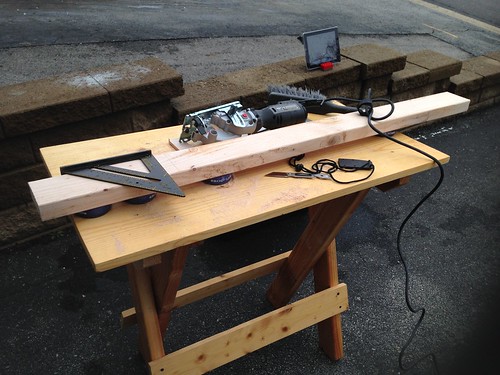
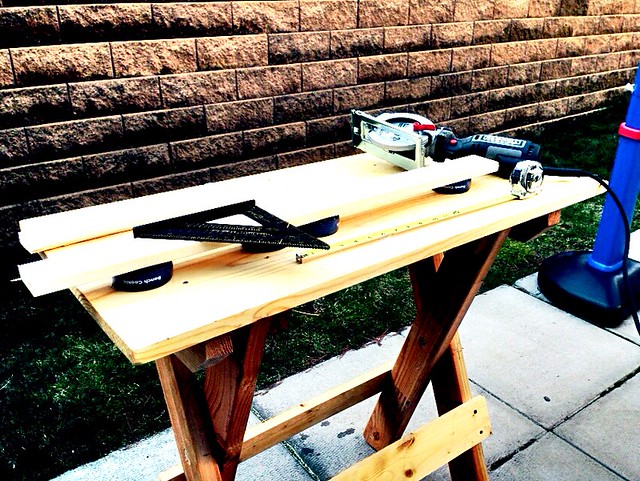
Speed square and circular saw
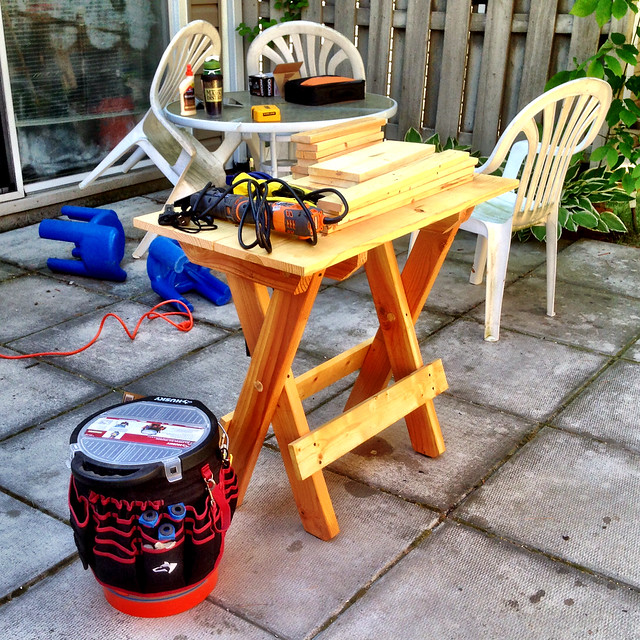
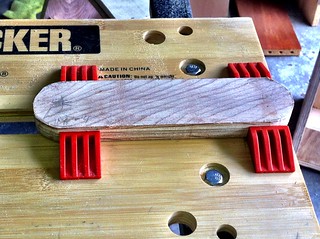
A 2x4 full of potential. Yes, the iPad stand is made from LEGO. My folding workbench was project I made just before my daughter was born.

First step, cutting down the 2x4. I had the Home Depot do one cut at 37" (which represents 3 12" steps with a little more to account for the kerf. This also made two pieces small enough to transport in my car.)  Further cuts were made with a 4 1/4" circular saw and a speed square. (A framing square was large enough to measure the cuts and a utility knife was used to mark the wood. Wood was supported by bench cookies, which meant that I did not need clamps for cutting.)
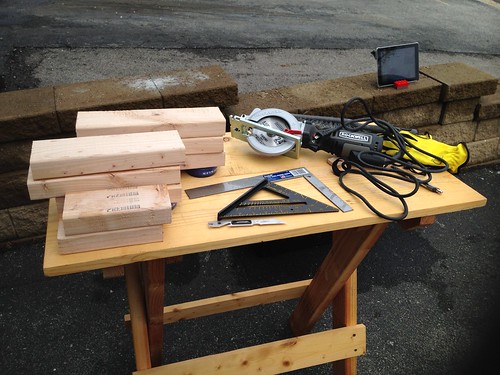
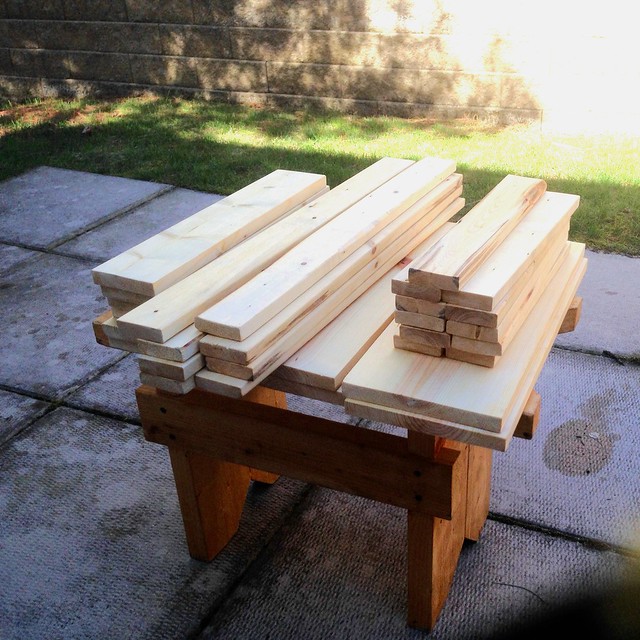
2x4s cut into pieces for step stool
2x4 pieces cut by compact circular saw

Next was sanding all the pieces down.  I have a Ridgid Jobmax multi-tool, and over the winter I bought the Fein Multimaster 4" sanding disc attachment. It is a lot larger than the detail sanding pad that usually comes with an oscillating multi-tool and delays the need for a palm sander. (and doing this by hand takes way too long :-)  )  I sanded everything down using 60 grit paper, with the plan to leave the final sanding for after the project was complete.

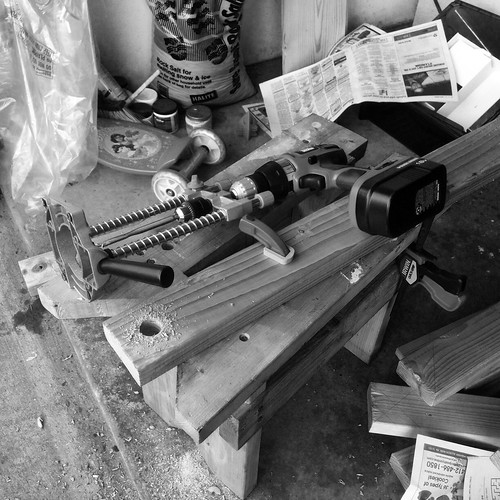
Next was assembly.  I used the Kreg pocket hole system (another winter purchase) and 2 1/2" pocket screws (because I was working with 2x dimensional lumber. Note to self: Kreg was delivered with 1 1/2" screws that are meant for 3/4" boards) I used my Quick Grip clamps on the flat part of the Kreg R3 (jr).  My first time using pocket holes. I am a believer.
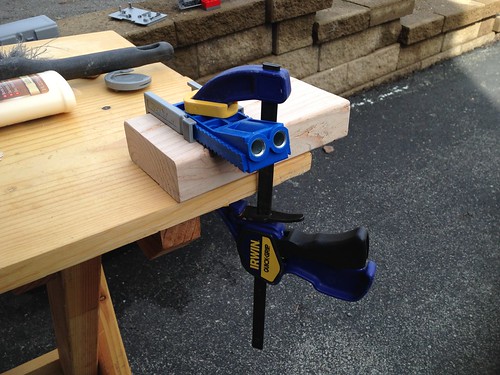

Using Kreg Pocket Hole system
Kreg R3 Jig with Irwin Quick Grip clamp

Next step: assembling the step stool. I used a corded Jobmax with the right angle drill head to drive in the pocket hole screws. One issue with the right angle head compared to standard pistol grips is that it is harder to control the torque, so my first leg did not go on straight.  Instead of taking the whole thing apart, after I assembled the legs, I put a wood blade on the multi-tool and cut off any overhang and cut down the back stretcher to size.

Finally, I put in fillers into the pocket holes and sanded the whole thing down with the new sanding disc.  I actually did this right and worked my way through three grades of sanding pads. This does make a difference, as the stool is noticeably smoother to the touch than my previous projects using dimensional lumber.
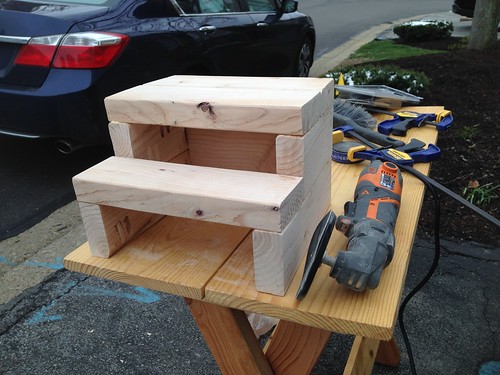

Sanding 2x4 step stool using multi-tool with sanding disc
Fein 4" sanding disc attached to Ridgid Jobmax multitool

A nice quick project. I did not stain it yet (waiting for the weather to warm up). But now that it is in use, I'm thinking about if I will stain it at all.  Certainly the kids like it (it is a lot more stable than what was there before.)
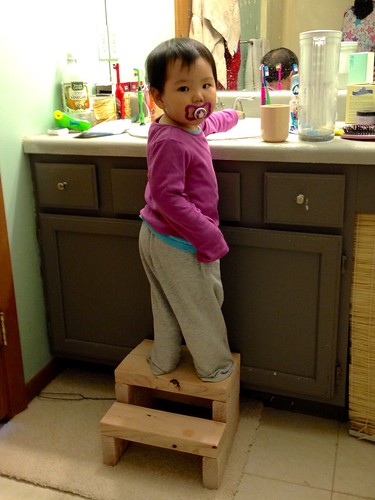
Using the new stepstool
2x4 step stool in action

Some notes:

  1. Tools used
    1. Rockwell 4 1/2" Compact Circular Saw
    2. Ridgid Jobmax Corded Multi-tool
      1. Right angle drill head
      2. Fein Sanding Disc attachment
    3. Kreg Jig Jr (R3)
    4. Framing square
    5. Speed square
    6. Bench cookies
    7. CRKT SpareTool (for marking wood)
  2. My  Folding worktable is getting a good workout. Maybe not as good a a full sized workbench, but much better than any purchased metal and plastic table would be.
  3. The advantage of having the multitool with wood saw blades, I can cut away any evidence of mistakes.
  4. Pocket hole fillers cannot be cut using a multitool saw. Either I sand it or cut it before it is in place. Maybe if I glue in the fillers and wait for the glue to set, it may be amenable to a saw.
  5. I like pocket holes. Much nicer to not have screws showing on outside surfaces.
  6. Mommy noted that the first step is not that deep (made from a single 2x4). But since it is only used to get to the second step, it is probably ok.
  7. Circular saws are a lot faster and more precise than jig saws at going through 2x4. I think a lot of my older projects would have been faster with it. I suppose that the jigsaw was useful as a first power saw with out of nervousness, but I would tell any beginner to start with a compact circular saw that can cut through a 2x4.

Monday, May 25, 2015

Building The Family Handyman Ridiculously Simple Shop Stool

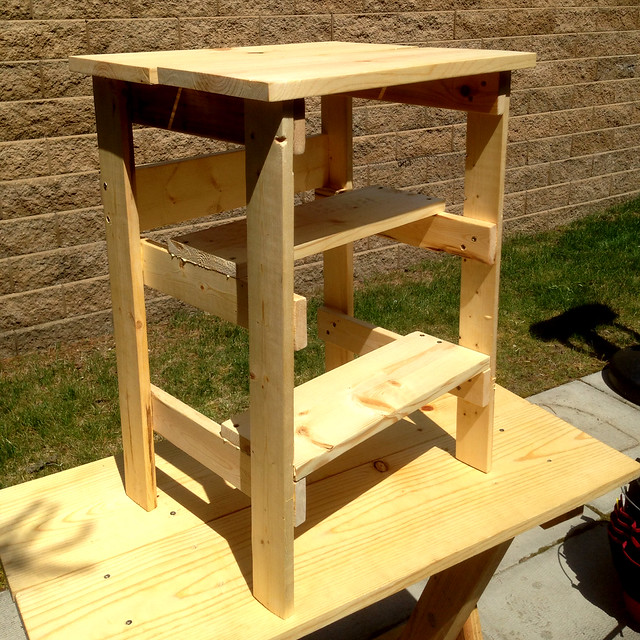
My latest project was the Ridiculously Simple Shop Stool. The goal of such a thing is to have something that is useful for sitting, a short step ladder, or as a fairly portable work surface. It is not necessarily pretty (hence it is called a 'shop stool' instead of a 'stepstool')
Plans for the Ridiculously Simple Shop Stool from The Family Handyman
Some important characteristics is that it is built from 1X dimensional lumber (so the wood is cheap) and it is all short straight cuts, which is important because I do not have a mitre saw, a table saw, or a router. 

My backyard workshop
First step was to cut the lumber. I got 1X3, 1X4, 1X6, and 1X8 lumber from The Home Depot. They cut each board once (that is there policy) so that I can fit it in my car.  I recently purchased a Rockwell Compact Circular Saw so I now could make straight cuts on 1X or 2X lumber, which was very helpful for this project.  A couple of nice features included the fact that it is small for a circular saw (single hand operation), so I could use it and a carpenters square without clamping.  Also, using bench cookies would stabilize the board by itself (small circular saw means less vibration).


Cut boards for making the Ridiculously Simple shop stool
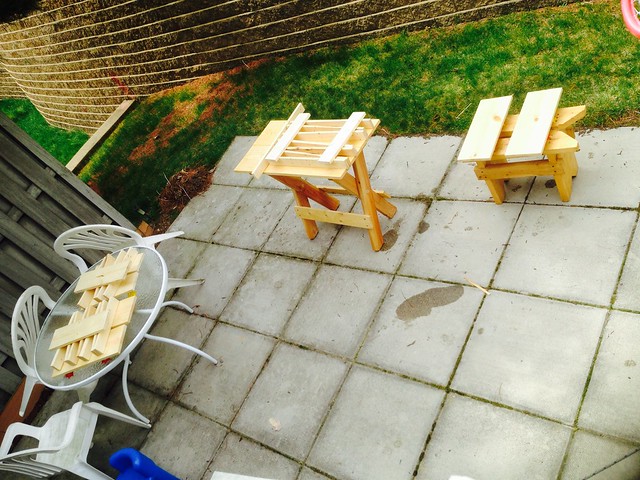
Cut wood for two shop stools

Measure twice, cut once
Cutting boards with a Compact Circular Saw and a Carpenters square.

Next step was sanding the boards and staining them. I used a rasp to break the corners, then three rounds with sand paper.  Staining was with Dutch Oil.

Staining wood for step stools
Staining boards

For assembly the hard part was the fact that 1X dimensional lumber is prone to splitting. I split my first two, then I noted that the instructions say to pre-drill holes to prevent splitting.  After that it was a lot easier.

The next tricky part was getting the steps in. The side slabs make it hard to get access to the tops of the steps. I think pocket screws would work, if I was up to learning how to do pocket screws.  Another new purchase was a right-angle driver/drill head for my Rigdig Jobmax multi-tool. The advantage is that I can drive in wood screws without as much space as the average cordless screwdriver.

After getting all the supports and steps glued, pre-drilled, and screwed in, we had the structure of the shop stool.


Ridiculously Simple Shop Stool completed
Complete shop stool

Next was to put finishing touches on it.  Scrapped off the excess glue.  Added non-stick safety tape on the steps.  Added hinges so that the second half of the top can be opened to make a stool top or folded to allow for steps. Added felt pads on the feet and on the top to protect the floor and to soften the sound when the top is opened or closed.

Ridiculously Simple Shop Stool
Two completed shop stools in the kitchen

A nice little project. It turns out to require use of two new tools (the Rockwell compact circular saw and the Rigdig Jobmax Right Angle driver). It will get multiple uses, as stools my in-laws like to eat at the kitchen counter when they are at our place so they can use two stools.  The steps are tall enough that my 4-yr old son can now help food prep and operate the microwave. The stool tops are good for side tables in our living room (so we can sit at our couches and eat). They also make for good work surfaces in the kitchen (that will always be clear because we need to use them for other reasons).

Very nice project. Thanks to The Family Handyman for providing the plans.

Thursday, May 08, 2014

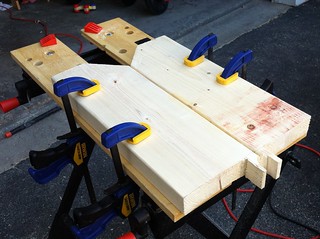
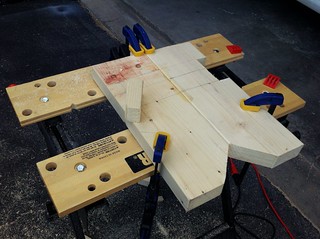
Making a folding worktable

First project of the summer was a folding worktable. The workbench I made last year is nice, but it is currently in use as a table sitting in the landing. In principle, it can be moved to the garage or the back patio as needed. In practice, it is hard to see that happening without a major cleanup effort. So I wanted a larger worktable that was still portable. The Black & Decker Workmate is too light for the task, and the sawbench I have is too small and low (but it is good for variety, and I still will need somewhere to sit)

I am using the worktable design that is described in a series of YouTube videos by "LJ Magnum" (video is at bottom of the post). The structure is made up of 2x4's, so it is rugged and stable. The top is a pair 1x10 boards, so the top is fairly tough as well. The folding part is provided by 1" dowels, so it is stronger than it would be if I used hinges.

First the wood. Richard Arendt posted plans based on these videos at http://hiswordinwood.com/plans_and_tutorials. I needed two 8' 2x4's, one 8' 1x10, one 36"x1" dowel, Cut list is at the posted plans.

Next was cutting the legs and supports. 22.5 and 45 degree angles were needed so that the table will be stable when opened. I cut these using a jigsaw. A jigsaw going through 2x4s is pretty rough, so I went back over them with a oscillating multi-tool and a file and sandpaper afterwords. What I really need to do this is a circular saw.

Lumber and boards for a folding workbench
Lumber cut by Home Depot


To drill in holes in the legs and tabletop supports I used a cordless drill and a drill guide. 1" holes through 2x4s was a pretty heavy burden on an 18V cordless drill. I had to use both batteries. If I have to do this again, a corded drill may be useful. It was the first time I used a drill guide, which worked pretty well. One thing I learned is that when drilling a hole, it always makes a mess at the end. So I learned to detect when the tip of the drill bit broke through, then flipped it around and finished it from the other side. I used a chisel to cut away the mess (which was now in the middle instead of the service of the 2x4) and I used a round file to smooth out the hole (and made sure my 1" dowel would go through).

The Wolfcraft Drill Guide
Wolfcraft drill guide and cordless drill

I used the plans to assemble the legs and top supports. A long dowel when across the top with the inner support and the inner pair of legs. On each side, the two legs and the outer leg and outer support were each connected with a short piece of dowel. For each dowel on each side, one piece was screwed in, the other piece was free to rotate around the dowel.

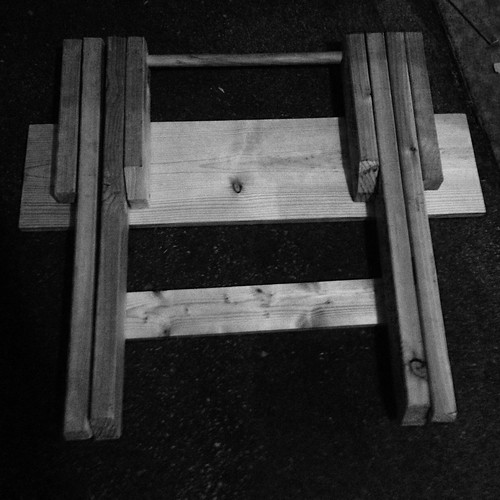
Legs and supports for a folding workbench
Structural components of worktable

Finally, I put the top on. First, for each of the two 1x10 boards, I picked a side to be on top (the one with fewer pits around knots). Then I picked the sides that best fit each other, using a surefile to make the fit a bit better. Then I drove screws to attach them to the supports (and messed up which support went with which top along the way, so I had to redo one side)

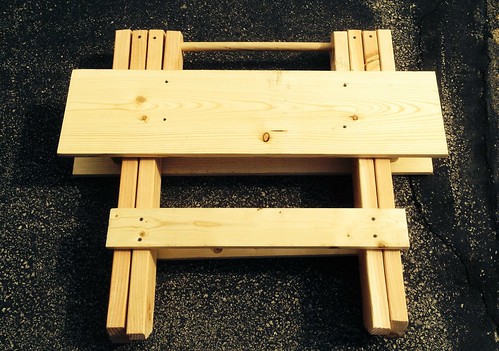
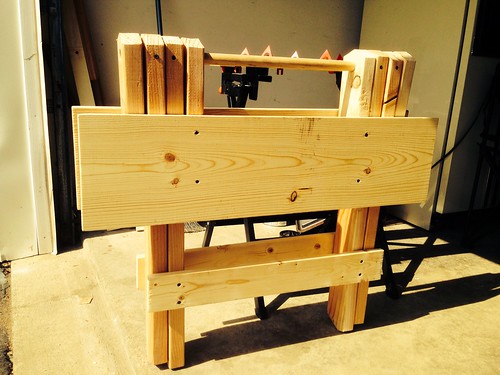
Folding workbench folded up
Folded worktable top and front braces

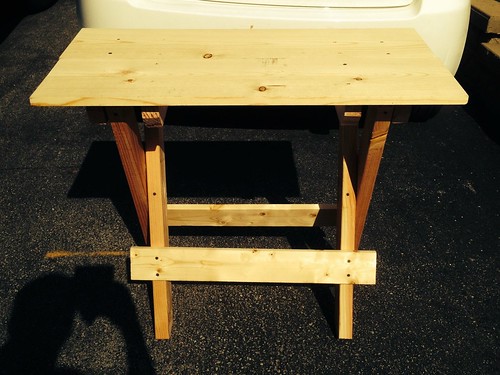
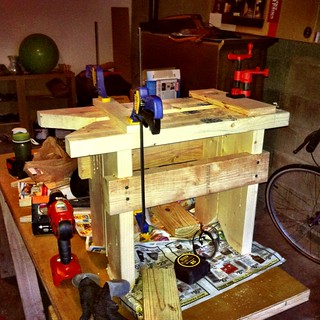
The result is a folding worktable. It is pretty stable due to the mass of the 2x4s that make up the legs and top supports and the use of the 1" dowels as joints, more than a commercial folding worktable with metal legs and bolts for joints would be. And it is fairly large. The fact that it is about standard table height also means that it can be used as a table for other things, like a folding table for eating that is much more stable than the norm.

The finished folding workbench
Completed worktable

Folded up folding workbench
Folded up worktable standing

I'm pretty happy with this one. Folds up nicely so I can put it out of the way, and stronger than most comparable folding tables. And I learned a few things while making it. A successful project.

Wednesday, December 04, 2013

I Can Do That! Woodworking Projects (ed by David Thiel): Book review

I Can Do That! Woodworking ProjectsI Can Do That! Woodworking Projects by David Thiel (Popular Woodworking)
My rating: 4 of 5 stars

What I liked is that it starts from the assumption that you don't know anything about woodworking (which is not too far off the mark). So it is a very gentle introduction to the tools, then each project includes discussion on the techniques being used. Which is refreshing compared to plans that say do X, and I may not know how to do X.

What is very helpful is that that it starts out by defining a minimum tool set, then every plan is based on the fact that you only have that set, so you will not get caught looking at plans that assume you have a equipment that reflected serious investment in money and space in your house. (to find the list, look for the "I can do that" section on the Popular Woodworking website. the "Free, online manual" is the tools chapter of this book.)

The plans are basic compared to many woodworking plans available. But this is because it purposely limits the equipment required and the plans are not chosen for the complexity, but as objects to teach techniques on how to use tools (such as how to measure, drill, join, hammer, etc.) and more tricks of the trade. And the authors explain why each technique works and the problems the technique avoids. Which is helpful when you are like me and don't even have the minimal list of tools they list.

Highly recommended as a starting point.

View all my reviews

Sunday, July 14, 2013

A two-step step stool

We had some plywood left over after the small scale handyman totes (largely because the big box home center gave us another piece after botching the cutting so badly).  So I decided to something quick and dirty.  A step stool.  My son is not quite tall enough to use the faucet in the main floor bath room.  There is one step stool we have that can get him up, but it is too high for him to step up to it.  Solution, build a two-step step stool.  I laid out a plan based on one from Ana White.  Goal:  Make the step stool, but keep everything within the plywood sheet we have.

Keeping it within the plywood meant that it could only be 12 3/4" high (12 inches because both sides have to fit inside 24", the 3/4" comes from the width of the plywood).  Two 6" deep steps, and roughly 12" wide (based on the need to get both the steps and the supports out of the same 24" wide piece of plywood).


Layout the wood
Laying out the cuts

The key for cutting something this large is to make sure both sides of the cut are supported.  So I used my workbench on one side and the Black & Decker Workmate on the other.  However, the workbench is actually sized to fit me, which means it is a little shorter than the Workmate.  But by using a set of bench cookies (from Rockler) and raising the Workmate slightly I had it roughly equal heights on both sides of where I was going to cut.

Using bench cookies to get the level right
Supporting the wood on both sides

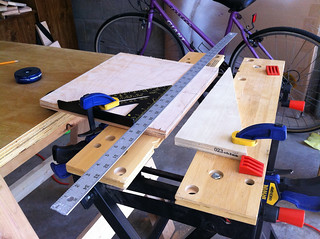
I don't have a table saw or a circular saw, so I was using a jigsaw, which is really not suited for long cuts.  I used a metal ruler to be my guide.  So each cut started out with me placing the jigsaw, the guide next to it, then my combination square to get the metal ruler going straight across the board.  I then clamped down the ruler and made the cut by having the jigsaw follow the guide.

Setting up a cut for a jigsaw
Cutting the board using a guide for the jigsaw
The cuts were supposed to be the hard part.  Especially since jigsaw blades are known to wander around on long cuts so while the cut may be straight at the top, the unsupported bottom is moving around so the cut is usually not straight all the way through.  But with a step stool, the next part is attaching the legs to the supports and the steps.  And getting started was a trick.

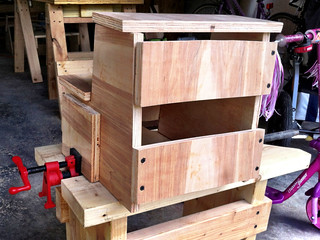
I started by attaching the stretchers to the sides.  First I clamped one side in the Workmate so that the back was exposed and level with the Workmate surface.  This let me attach the sides to the back of the Workmate.  Next, I used my sawbench and pipe clamps to hold one side of the stool while attaching the stretchers to the other side.  My cross cuts for the stretchers turned out pretty bad, while my rip cuts on the sides were pretty good, so I aligned the stretchers using the sides, and ignored the fact that top and bottoms of the stretchers were messed up.

Supporting sides up while driving in screws
Supporting step stool side with the pipe clamp on the sawbench
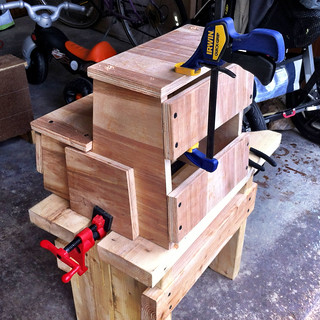
After the sides, then came the steps.   Now, the jigsaw is pretty bad about making straight, square cuts, but it turns out that in this design, the sides are not vertical either.  So, of my two steps, I looked for the one with the edge that slanted just like the step cuts and made that the bottom step.

Putting on the steps
Now to attach the steps.

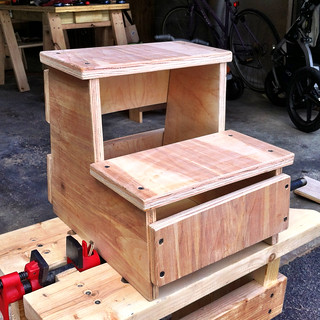
So now I have an assembled two-step step stool.  After this, I used a rasp, then file, then sandpaper to round off all the edges.
Two step stepstool assembled!
Assembled step stool
Next step is to finish the wood.  I'm going to put on Danish oil, because that is what I have lying around, and let that sit overnight.  Then we get to see if T uses it.

Some room for improvement.  The original plans have the supports in between the legs, not attached to the ends.  Maybe if I have time someday I can take out the supports and re cut them (they are pretty messed up) and do this the right way.

Sunday, July 07, 2013

My version of the New Fangled Sawbench

We have a few projects going around the house. One thing I've noticed is that my father-in-law does not use the workbench. He sometimes uses the Black & Decker Workmate for some detail sawing, but he uses some small stools he made up when doing any major cuts. The issue is that the workbench and workmate are too high for doing hand work. Enter the sawbench.

The modern advocate for sawbenches is Christopher Schwartz at Popular Woodworking Magazine. An he has many iterations on sawbench design and use at that site.

The purpose of a sawbench is for using handsaws. To do this properly, you need to be able to use your weight to hold the material steady and to cut. And the traditional workbench that is about wrist high is really for planing and power tools and is too high for this. The sawbench should be about knee high so you can kneel on top of material on top of the workbench. In addition, some designs have a notch at the front for use when ripping boards (cutting with the grain). Some have a slot in the middle for supporting pieces on both sides. Some have splayed legs, others straight. I choose to use a design from the Timber Frame Tools blog, which is based on a design at the Dan's Shop blog. This version is made up of 2X6s (with 2X4s for stretchers). I liked the idea of straight (thick) legs, so I could use it as an actual sitting bench as well. And I have not gotten to the point I could cut good mitres with any degree of accuracy.

I got a 10' 2X6 from the local Lowes, and they cut it down for me. I was going for 24" top, and 17" tall. The height was based on me going around the house and kneeling on chairs until I found one that seemed to be the right height for kneeling, with allowances for shoes and some material thickness. The length was based partly on the fact that I needed everything to fit in a 10' board, and by the fact that this is going to have to live underneath my workbench and the workbench top was 24" deep.

Step one is to make the legs. Each leg is made of edge glued 17" 2x6s. There is a notch in the bottom of the legs to help with stability (I don't think there is any flat-level surface in the house, the space here helps keep the rocking under control.) In addition, I cut notches where the top will go, with a spacer in the middle. The slot in the spacer will have a 1/2" pipe clamp, to serve as a vice.


Glueing legs together

Next for the legs is to cut some notches for the stretchers. One option is to put the stretchers up against the top. I chose to put them a couple inches below so that I would have some room for clamps in any direction along the top.

Notches in legs for stretchers

Next to work on the top. The boards were somewhat cupped, so I (and my father-in-law) spent some time planing them smooth. I put a notch in the top as well. While I could say that it is for ripping wood, the real reason is that I found a split in one side of the top, and cutting out the notch to get rid of the split.

Now that the pieces were all cut, time to put everything together. First the stretchers. The notches were good enough so that they fit in snug, and I could test the placement. The stretchers were sized to be a 2x4 we had laying around cut in half, so 19". I made it so that it was about 1" behind the notch in the front, and 2" from the back. These were then put in with glue and then I screwed them in. Next was the top. Since the notch for this was sized, this was glued on as well. For this, I wanted the glue to harden before screwing them in. (I did not worry about the stretchers because the fit was so tight the screws were not going to knock them out of alignment.) Then I clamped everything together with speed clamps and a pipe clamp.

Glueing on the top

The next day, I put in screws help hold the top to the legs.  First, I used a 1/2" spade bit to make a well for the screw (to keep the screw head below the top of the bench).  Then used the cordless drill to drive in the screws.


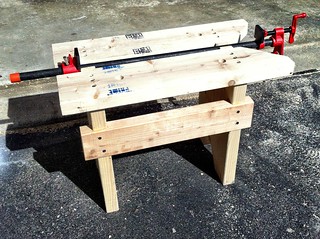
Pipe clamp and bench dog holes

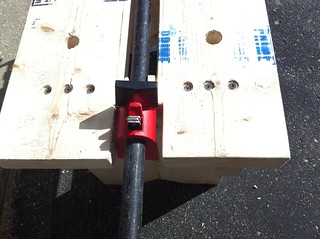
Last step, I put in two pairs of bench dog holes. These are to work with the pipe clamp to serve as a vice for holding material. (something I have not put onto my workbench) I rather like the pipe clamp trick. The idea is what is usually the backside can rotate in any direction, so you use the clamp side to hold onto the workbench and the back side to hold the material (or the reverse). The bench dogs can also be used to hold material against the clamp. The pipe clamp I got already had padding, so a wood block is optional. (or if I want a wide surface to clamp with)

Finished sawbench

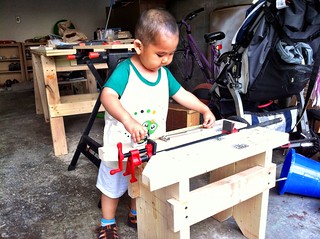
At the Timberframe Tools site, he gives this an alternative name as the "Toddler's Workbench", because it looks like a small version of a real workbench (straight legs, bench dog holes) so his son can play with it. So does mine :-)

New Fangled (AKA Toddler) Saw Bench

Some things for next time around. I need to learn how to cut notches the long way through lumber. It would be better if the top had a slot so that it was seated in the legs so there is wood providing lengthwise support, not only glue and screws. Also, I messed up the slot in the middle. I needed it to be the width of the clamp housing, not the with of of the clamp (or of a board which was used in the original design). I got it to work by going back and making the slot wider, but I could have used that width to make the pipe holder slot stronger. I'll probably stain it with Danish oil. And after I've used it a few times with bench dogs, I may put in another pair or two of bench dog holes. But I'm happy with this one.

Friday, July 05, 2013

Scaled down versions of the Handyman tool tote

The tool-tote (plans at the Handyman club) I had made a while back had one problem, it was big.  The reason it is big is to have an 18" box, which is big enough for most full size hammer.  In addition, it was trying to get the top high enough so that you can use it as a work surface where you can kneel on a board on the top while working with it.  And that means it has to be wide enough to be stable.  All that means that my wife won't use such a thing.  So we're giving it to my father-in-law, who needs a tool box and a stable work surface, and I'm going to make a couple more smaller versions for us.

Completed tool tote / sawhorse
Looking at the scrap, I figured out how a layout where I could make two boxes with the leftovers from this and the workbench and a single 2' X 4' piece of plywood.  So my wife goes to get the plywood.  And the guy who was helping her completely mangles the thing.  I had a layout so that if you made four 12" x 12" boxes in a square pattern on one half of the board, you would use the remnant that would be slighly less than 24" x 24" for the rest and there would be waste at the end.  Instead, he decides to make 12" boxes straight across the long way.  And he was using a board that was 24" wide, but 47 1/2" across, so that means that the last board would be 12" wide, but significantly less than 12" long.  And it also means that the rest of the pieces would be hard to cut out.  (big box stores generally don't mind doing cuts in plywood and lumber as long as they are straight through cuts)  This meant that I had to do some tinkering with the design to make it work with the cuts he gave us.

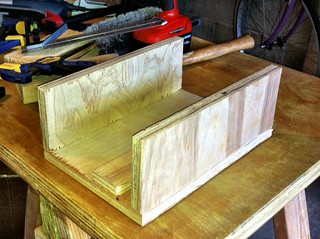
So, basic idea is to make two bins.  Both 12 3/4" high  (12" + the width of a plywood topshelf).  And the other dimensions whatever would work.  In particular I ended up having one top be 4" wide and the other 5" wide (the original goal was to have them both 5" wide).  And the box would be 12" long (instead of 13") and 8" across.  Because the top piece was across the top of the sides, it would actually be quite stable and strong (i.e. you could stand on either one without worry).

Box for the tool tote

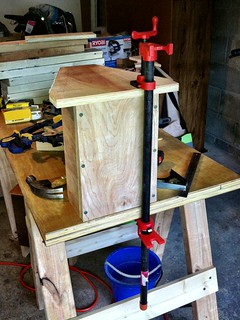
This time was much smoother, the benefit of having done this before, and now I have a few more clamps and other tools that I've been accumulating while doing other projects.  And my general skill level with measuring, layout, and cutting has been improving.

Using a pipe clamp to hold the sides for screwing in

After the box is put together, next came the handles.  This worked well the last time, so this time with four handles to make it was practically a production line.  The Workmate acquitted itself nicely again to hold the handles for both rounding the handles as well as making the necessary holes for the bolt and the handle dowel.

Making the handles on Black & Decker Workmate

Finally the completed project.  It is incredible what a difference 2/3 scale makes.

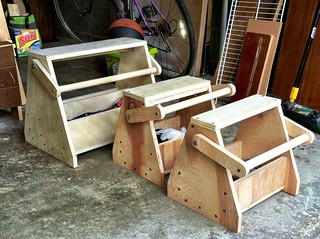
Tooltotes next to full size model

And the reason for doing two of them:  so that I have the equivalent of two short sawhorses.  In this case I wanted to cut out a notch on the bottoms of the original version so that it be less prone to rocking on non-smooth surfaces.  Normally this would have been a problem because the handle would get in the way of putting it on my workbench top.  But with the tool tote/sawhorses I could lay it across the two of them and clamp them so I could work.

Scaled down tool totes in action

So now, we're passing on the original to my father-in-law so he could use it as a tool storage and a small workbench, and we have two short boxes. My wife is using hers for paint and gardening stuff.  I'm using mine to store measuring things.   A nice quick project.

Saturday, June 01, 2013

Building the Handyman Club tool-tote

The first real project was the tool-tote found at the Handyman club.  It was supposed to be a combination tool-tote and workbench/stool/sawhorse.  I figured it would be something S could use for gardening (since we don't have any organization for gardening stuff).  And a toolbox is high up on the list of early wood working projects (along with a sawhorse and workbench)

I got the plywood and the wooden dowel from Lowes.  (the rest of the plywood became the workbench top discussed in an earlier post.)  They cut it into rectangular pieces (which accounted for most of them.  I have to do any shaping, such as for the sides and rounding the handle brackets (and putting in holes for the handle to fit into later.

Cut and shaped plywood for the tool tote. The paint bottles were to size the box later.  One compartment was to be sized to fit those cans.

First, was the box part of the tool tote.  In addition to the base, there were two sides and a divider to put in. Using the vise part of the Workmate workbench, this was pretty straight forward.  Only complication was adding in the divider.  Because the divider was sized to be the attachment of a lid made up of plywood, I used two scrap pieces of plywood to brace the sides and the divider was just the right height.


Next was adding the box to the sides.  This is where it helped that my earlier project was to build a workbench.  One side of the workbench became an assembly area and the other half became a tool storage and part layout area.  The Workmate was for sawing and power sanding.  One problem here was putting everything together.  The plans called for 1 5/8" Deck screws.  But when they had to go in a piece of plywood on a 3/4" edge, sometimes the plywood would split.  Especially when countersinking the screws.

The main part of the tool tote. You can see the Workmate in the back set up for cutting a wood dowel handle.

The other difficult part was the handle.  First, the 1" dowel was just a little too large for the whole that I made using a 1" spade bit.  Not much of a problem, I took a file and filed down about an inch of each end.  The other mistake I made was where I located the brace.  It was offset from the center because I needed to make room for the handle.  But because this deck screw was going into the narrow part of the plywood, it did not want to countersink in.  So I had to move the brace to be far enough from the handle that it would not interfere with the handle rotating.

Completed tool tote / sawhorse

This tool tote was very solid.  I got up and stood on it and it did not even think of moving.  The result of building something using screws and plywood instead of tacks and particle board.  And it was designed to double as a sawhorse style workstool, so it turns out it is pretty big (18" long, 16" high).  So it may not be my wife's garden tool caddy after all.  We'll find a use for it. It may go to my in-laws when they move.

The point of starting out by making things like sawhorses, workbenches, and tool caddies is to practice skills.  I've never done stuff like this before, other than the occasional kit. And I've never really used power tools before.  Now in addition to the cordless screwdriver/drill, we have the oscillating multi-tool and a jigsaw.  And we added a number of new bits for the drill and I'll be looking at more blades for the multi-tool and jigsaw so we can handle 2x lumber in addition to plywood.  Skills are another area of growth.  I got a lot of practice with the combination square and speed square, and use some tips and techniques that were part of YouTube videos.  Also learned some of the limitations of the jigsaw and multi-tool (part of it was that I only have a limited number of blades) and my jigsaw skills in particular have improved over the three projects.

Next steps, inventory the scrap lumber and plywood to see what else I can make :-)


Tuesday, May 28, 2013

Building a sawhorse workbench

My memorial day weekend project was to build a workbench.  Now, I have not done real woodworking before, but a workbench is one of those traditional first projects.  And since we really don't have a place to put a workbench I decided to make a sawhorse workbench with a plywood top that I can breakdown and bring it into the backyard when I want to work.

First the size.  Well, actually, I was thinking of something less ambitious, like a toolbox.  But I found this nice set of plans for a toolbox that could do double duty as a stool for working in the garden, and it required a 4' X 4' piece of plywood.  But plywood does not come in that size.  It comes in 2' X 4' or 4' X 8'.  So I figured I'd get a 4' X 8' and whatever was left would become a workbench top.  Which means I'm making a workbench.  Now, that makes perfect sense, right?

First part, making the sawhorses.  As a bonus we have a couple cabinet doors that we want to make into a table for T, so it is ok to mess up one set.

I did the first pair of sawhorses using a couple of sawhorse brackets.  The idea is you put 2"X4" as the legs into the brackets, and the jaws of the brackets close down on another 2X4. (with everything screwed in for permanence.  Problem:  The brackets are just a little to small to fit in a 2X4.  A quick search on Amazon.com reveals this is a common complaint.  Apparently at least one manufacturer of these things doesn't recognize the difference between inner and outer diameter (I figure they are too small by just about the thickness of the metal.  So after way too much work shaving the ends of the 2X4's, I had the first pair of sawhorses.  These will someday turn into legs for a table for T.

Building sawhorse using sawhorse brackets.  I'm going to saw these down to size so everything is clamped up.

So, let's try again.  This time I'm building these from lumber.  There is a set of plans that basically call for making an I-beam and putting legs on them, so that is what I'll do.  Now, I did a layout of the 4'X8' and figured I can fit the toolbox all in 4' X 37", which leaves 4' X 59" for the workbench.  Cut that in half and I get a two-ply 4' X 29 1/2".  I wanted a little more stability than you get from just a pair of sawhorses 3' apart so I will put in joist hangers so I can have a pair of crossbeams for more stability.

First, make the sawhorses.  The joist hangers really don't work with an I-beam, so I'm making a T-beam, and attaching joist hangers to the vertical.

Joist hangers for the sawhorses

Next, complete the crossbeam.  The Workmate workbench is good for holding the vertical in place while I work.  Also have a couple of blocks to help hold everything steady while I put in the horizontal beam.
Finishing the sawhorse beam.  I'm a member of the "You can't have too many clamps" club

Two crossbeams, then attach the legs (all this is using 3" drywall screws and a cordless screwdriver).  Now I have two sawhorses with joist hangers for crossbeams.
Here is the frame of the sawhorse table.

For the top, I took the two layers of plywood, then glued and screwed them together (using Elmer's wood glue and 1" wood screws)  Clamp everything together overnight and I end up with a nice size worktable.  (oh, this is after taking apart one of the sawhorses and putting it back together because it wasn't really square on one side)

My first workbench

Some things still to do:
  1. Sand everything.
  2. Once I decide just where I want the table top in relation to the legs, I'll attach the crossbeams to the table top to give it more stability.
  3. Add in 3/4" bench dog holes.  Once I figure out where they should go.
  4. Probably fut a finish on the top (Danish oil?  Tung oil?)
  5. If I'm satisfied with the sawhorses (I probably will try to level them a bit better), I'll add in braces on the legs.  And probably a shelf on one of them (just one, so they will still be stackable)
Some things I learned along the way:

1.  Sawhorse brackets suck. Big thumbs down.  I'll never get those again.
2.  I probably was way too careful with clamping down while making the sawhorse.  It was a lot easier when I broke one of them down to put back together just bracing everything by hand.
3.  2X4 are not all alike in size.  Even when they come from the same batch.  Measure according to the actual piece you are going to put in.
4.  Jigsaws have to go real slow through 2X4's or they will bend.

Once I'm done sanding, I will actually get around to making that garden tool box that was the excuse for getting that plywood :-)