 |
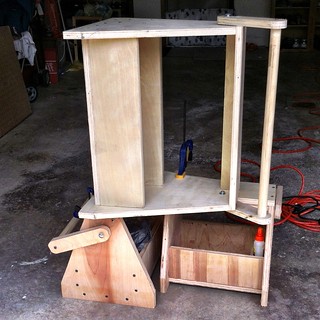
| Completed tool tote / sawhorse |
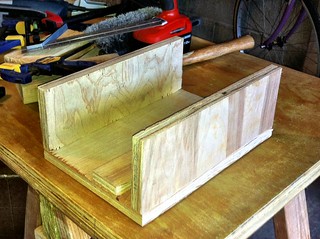
So, basic idea is to make two bins. Both 12 3/4" high (12" + the width of a plywood topshelf). And the other dimensions whatever would work. In particular I ended up having one top be 4" wide and the other 5" wide (the original goal was to have them both 5" wide). And the box would be 12" long (instead of 13") and 8" across. Because the top piece was across the top of the sides, it would actually be quite stable and strong (i.e. you could stand on either one without worry).
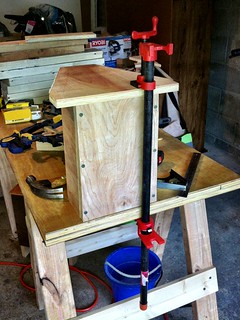
This time was much smoother, the benefit of having done this before, and now I have a few more clamps and other tools that I've been accumulating while doing other projects. And my general skill level with measuring, layout, and cutting has been improving.
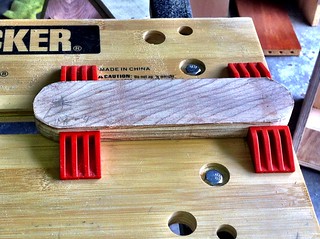
After the box is put together, next came the handles. This worked well the last time, so this time with four handles to make it was practically a production line. The Workmate acquitted itself nicely again to hold the handles for both rounding the handles as well as making the necessary holes for the bolt and the handle dowel.
Finally the completed project. It is incredible what a difference 2/3 scale makes.
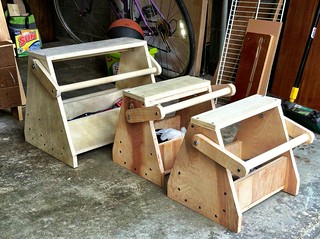
And the reason for doing two of them: so that I have the equivalent of two short sawhorses. In this case I wanted to cut out a notch on the bottoms of the original version so that it be less prone to rocking on non-smooth surfaces. Normally this would have been a problem because the handle would get in the way of putting it on my workbench top. But with the tool tote/sawhorses I could lay it across the two of them and clamp them so I could work.
So now, we're passing on the original to my father-in-law so he could use it as a tool storage and a small workbench, and we have two short boxes. My wife is using hers for paint and gardening stuff. I'm using mine to store measuring things. A nice quick project.
No comments:
Post a Comment