 |
| 2x4 step stool diagram |
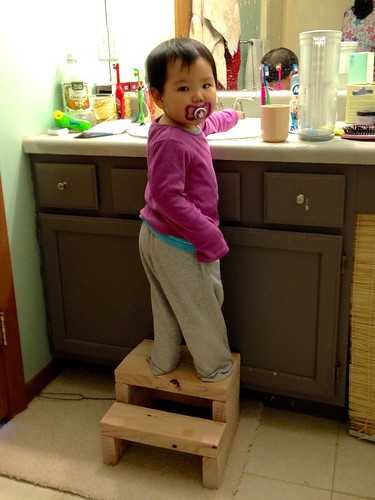
What brought this on is that a step stool made by my father-in-law collapsed while we were dealing with a tantrum. While the shock of the collapse did end the tantrum, we now did not have a step stool for the kids in the upstairs bathroom (which is needed so they can use the sink on their own). And, to be honest, I had a few purchases over the past few months that needed a workout.
I used a design described in the blog MoreLikeHome.Net that built a stool from a single 2x4 (I think that I've seen this design in response to a contest of what can you make from a single 8' 2x4). So, went to our favorite Home Depot to get a 2x4 while my son was at a birthday party not too far away.
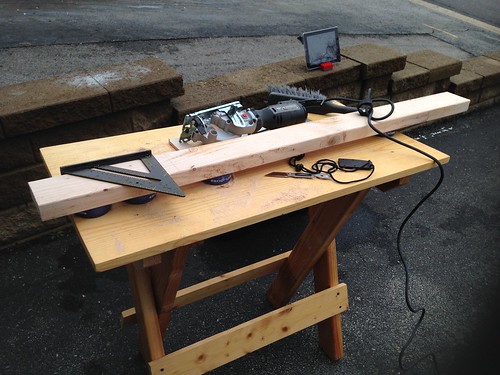 |
| A 2x4 full of potential. Yes, the iPad stand is made from LEGO. My folding workbench was project I made just before my daughter was born. |
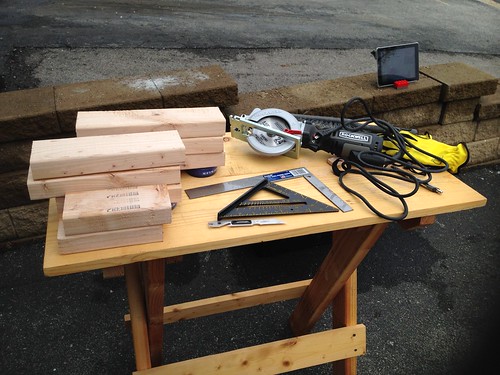
First step, cutting down the 2x4. I had the Home Depot do one cut at 37" (which represents 3 12" steps with a little more to account for the kerf. This also made two pieces small enough to transport in my car.) Further cuts were made with a 4 1/4" circular saw and a speed square. (A framing square was large enough to measure the cuts and a utility knife was used to mark the wood. Wood was supported by bench cookies, which meant that I did not need clamps for cutting.)
Next was sanding all the pieces down. I have a Ridgid Jobmax multi-tool, and over the winter I bought the Fein Multimaster 4" sanding disc attachment. It is a lot larger than the detail sanding pad that usually comes with an oscillating multi-tool and delays the need for a palm sander. (and doing this by hand takes way too long :-) ) I sanded everything down using 60 grit paper, with the plan to leave the final sanding for after the project was complete.
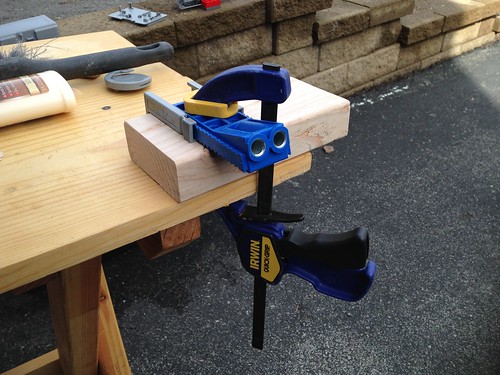
Next was assembly. I used the Kreg pocket hole system (another winter purchase) and 2 1/2" pocket screws (because I was working with 2x dimensional lumber. Note to self: Kreg was delivered with 1 1/2" screws that are meant for 3/4" boards) I used my Quick Grip clamps on the flat part of the Kreg R3 (jr). My first time using pocket holes. I am a believer.
Next step: assembling the step stool. I used a corded Jobmax with the right angle drill head to drive in the pocket hole screws. One issue with the right angle head compared to standard pistol grips is that it is harder to control the torque, so my first leg did not go on straight. Instead of taking the whole thing apart, after I assembled the legs, I put a wood blade on the multi-tool and cut off any overhang and cut down the back stretcher to size.
Finally, I put in fillers into the pocket holes and sanded the whole thing down with the new sanding disc. I actually did this right and worked my way through three grades of sanding pads. This does make a difference, as the stool is noticeably smoother to the touch than my previous projects using dimensional lumber.
Finally, I put in fillers into the pocket holes and sanded the whole thing down with the new sanding disc. I actually did this right and worked my way through three grades of sanding pads. This does make a difference, as the stool is noticeably smoother to the touch than my previous projects using dimensional lumber.
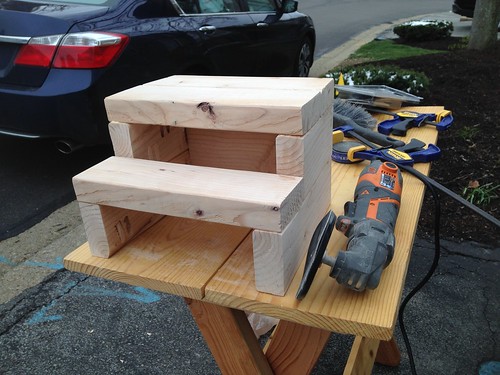 |
| Fein 4" sanding disc attached to Ridgid Jobmax multitool |
A nice quick project. I did not stain it yet (waiting for the weather to warm up). But now that it is in use, I'm thinking about if I will stain it at all. Certainly the kids like it (it is a lot more stable than what was there before.)
Some notes:
- Tools used
- Rockwell 4 1/2" Compact Circular Saw
- Ridgid Jobmax Corded Multi-tool
- Right angle drill head
- Fein Sanding Disc attachment
- Kreg Jig Jr (R3)
- Framing square
- Speed square
- Bench cookies
- CRKT SpareTool (for marking wood)
- My Folding worktable is getting a good workout. Maybe not as good a a full sized workbench, but much better than any purchased metal and plastic table would be.
- The advantage of having the multitool with wood saw blades, I can cut away any evidence of mistakes.
- Pocket hole fillers cannot be cut using a multitool saw. Either I sand it or cut it before it is in place. Maybe if I glue in the fillers and wait for the glue to set, it may be amenable to a saw.
- I like pocket holes. Much nicer to not have screws showing on outside surfaces.
- Mommy noted that the first step is not that deep (made from a single 2x4). But since it is only used to get to the second step, it is probably ok.
- Circular saws are a lot faster and more precise than jig saws at going through 2x4. I think a lot of my older projects would have been faster with it. I suppose that the jigsaw was useful as a first power saw with out of nervousness, but I would tell any beginner to start with a compact circular saw that can cut through a 2x4.
No comments:
Post a Comment