Sunday, October 27, 2013

Data Points by Nathan Yue: Book review

Data Points: Visualization That Means SomethingData Points: Visualization That Means Something by Nathan Yau
My rating: 4 of 5 stars

This book is not about how to create data visualizations, it is about how you use visualizations to communicate data. In that respect it is not trying to be a book about tools, but a book on aesthetics, it focuses on how you evaluate different combinations of visualization options for communicating different types of information about data, not just a number of rules. In this respect, it goes considerably deeper and profound about how people comprehend and interpret visualizations than a set of pithy rules masquerading as common sense. In this respect, it is a successor to Tufte in an age where being able to try alternative visualizations and even having consumers interact with the visualizations is cheap.

The book is not a description of various types of visualizations, even though it has such descriptions and discussion of comparative assessments. It is a book on how to think about the message(s) you are trying to communicate, and how to do so in ways that can engage the reader at many layers of depth where simple messages are easily grasped, and complex messages can be absorbed with their relations and implications. Along the way he discusses the relative strengths of using different types of visual cues to communicate information (position, length, angle, direction, shapes, area, volume, saturation, hue), which is much deeper than saying 'bar charts are better than pie charts' (which is an argument that a post-doc tried to engage in with me once). After a brief introduction, he proceeds to show you by example after example of the comparative qualities of each cue, and also how they can be used in combination to show multiple levels of information and relationships.

One of my biggest insights from 'Data Points' is actually not discussed in the book. The book gives you the understanding you need to evaluate the range of combinations of means of presenting data. But about halfway through I realized that the discussion and philosophy of combining these visualizations has a name. Wilkinson's Grammer of Graphics. I have learned the ggplot implementation of Grammer of Graphics, and I favor it above other plotting families in R and Python as being more flexible and giving you more control over the result. The discussion in Data Points explains why Grammer of Graphics is important, it provides an interface for exploring combinations of aesthetics (visual cues) to communicate aspects of complex data sets. And with this, it will probably change how I present and teach visualization for data analysis.

View all my reviews

Saturday, October 19, 2013

Beautiful LEGO by Boyle: Book review

Beautiful LEGOBeautiful LEGO by Michael Doyle
My rating: 5 of 5 stars

This is a beautiful and inspiring book. The pictures are works of art. Some majestic in scale, some more at the level that you can imagine someone actually doing, if they had the artistic vision these creators did!

I like LEGO because of the ability to create. I remember as a young boy soon after a move using LEGO to build a model of my old house, with each floor, stairs, and every room represented. With my son, we have DUPLO's that have not gotten old. Some of the things we have made for him have been kept together for regular play for months at a time.

What this book and the artists that it interviews discusses is the use of LEGO as a medium for art. Where it makes the jump from a toy to art is when you creatively consider possibilities within the context of a constraint. And like the photographer who chooses to use black and white, the use of LEGO instead of clay is the fact that it comes in generally rectangular blocks. This book and the interviews recorded here deal with many ways of approaching this type of abstraction. From large scale recreations that rely on distance and scale to convert the blocks to a realistic looking objects, to abstractions with just enough detail so that the idea is recognizable and can fill in the rest.

My hope for my son is that LEGO gives him his first taste of creation, of having a picture in his mind and using building blocks, growing slowly towards that vision with all of the trial and error that involves, and ending with something he can call his own. And in this book, some of artists show that there start was much the same.

Disclaimer: I received a free electronic copy of this book through the Oreilly Press Blogger Program

View all my reviews

I review for the O'Reilly Reader Review Program

Wednesday, October 16, 2013

An Introduction to Data Science by Stanton: Book Review

An Introduction to Data Science by Jeffrey M. Stanton
My rating: 4 of 5 stars

This freely available book fills a nice little niche, people getting started in data analytics. The first problem people have in learning this is they tend to learn a number of techniques, but in practice they cannot get past the step of accessing and preparing the data. This book covers this and gives good practice in it. I plan on using this as the first of two texts for the course. This book will get them started (gently) in R and accessing and processing data, then a case based data mining book where they can use what they learn here to work with larger data sets that are then analyzed in the methods that the other book goes into more depth.

This book would be for those who are just getting started and need some hand holding as they get started with the R environment as well as those who don't really know where to get started with new data sources. It is most useful for those who are starting from nearly scratch, but also for those whose education included data analysis techniques, but whose training neglected those crucial steps on how to get started and why you should be using some class of method, not just the how. And since it is a free electronic book, it is a low cost way to get started.

View all my reviews

Thursday, October 10, 2013

Data Science for Business by Provost and Fawcett: Book review

Data Science for Business: What you need to know about data mining and data-analytic thinkingData Science for Business: What you need to know about data mining and data-analytic thinking by Foster Provost
My rating: 5 of 5 stars

What Provost and Fawcett have done is to write a book on data mining that focuses on the why of data mining technique, which is great complement to all the books that focus on the how of data mining. And because it focuses on the why for the myriad of methods that fall under the heading of data mining, this would be a good source for a manager of a project for which data mining was merely part of the project, or for a source of good explanations when you need to explain to others what data mining methods (or buzzwards) can and cannot do.

I've come across a number of data mining books. Some are deep into the mathematics and statistics that underlie the methods of data mining. Others focus on how you implement methods. But while this helps with technique, a missing niche is the why, or the morality of data mining methods. They go over a range of methods, but the focus is on the task, recognizing what kinds of questions can be asked in a situation, then how to answer it. This is different from a methods book that has chapters focused on PCA, SVM, trees and forests, or other techniques. The second can lead to tossing out buzzwords. This book is the first, and is for having conversations about how to get a task done.

While I've read and worked through examples from books that focused on methods and implementations, I think that my understanding of data mining has improved significantly on reading this book. I'm recommending it to a former student who has since had to learn and implement these methods in practice, so he can better explain what he has done and its significance at his company. My only nit to pick is the title.  The book clearly focuses on data mining, not on other aspects of data science. Within that realm, I recommend it unreservedly.

Disclaimer:  I received a free electronic copy of this book through the OReilly Blogger program.

View all my reviews

  I review for the O'Reilly Reader Review Program

Thursday, October 03, 2013

Parenting Month 35: Oh the tales I have to tell

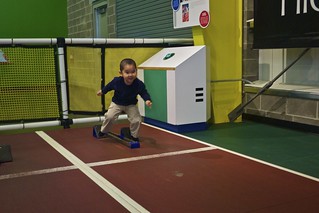
On your mark, Get set, Go!
On your mark! Get set! Go!

We have an energetic child this past month.  Lots of running around everywhere.  Exploring outside.  Jumping off of things and just because.  And always having something to say. "I'm talking!"

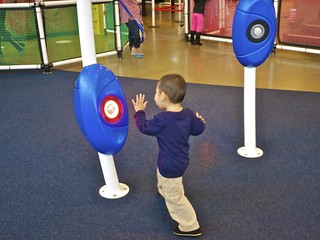
Tag the red circle
There is the red circle

Along with all the activity comes a lot more talking. At home he is constantly talking. Sometimes he is talking to one of us. But he has started telling stories to stuffed animals Pooh and Turtle (he had not played with stuffed animals before), or even pretend to read (he has a book open, and he tells a story as he turns pages. The story may or may not be related to the book, but that does not really matter at this point, does it?) Day care reports that he is now talking to all of the staff, although not so much with his classmates. Although, day care also reported that he had a girlfriend (i.e. they hold hands and sit together for lunch) for a period of time (I don't know if this is current, not knowing the dating cycles of 2-year olds) The center staff also notes that he does not grab toys, but that is more because he never got attached to toys rather than being polite and playing well with others.

It turns out that most of his classmates at day care have older siblings, which means all of them share whatever is going around their older siblings schools. So he has another round of being sick with the ailment of the week. Of course, we have to report to the doctor that despite being sick, he is generally happy and playful, so this does not get all that much concern.

Walking through the woods
I'm hiking in the woods

Monday, September 02, 2013

Parenting Month 34: Where did mommy and daddy go?

Bahia Honda State Park
Who is not in the picture?
This month's grand event. Mommy and daddy took a vacation without T. For five days! This was not our first time without him, but the last time was only for two nights. So we are increasing the length :-) Now, we like T and all, and we even took a vacation with him earlier in the summer. But it is nice to have a few days without him. And healthy for him. Based on reports from grandma and grandpa, he did all right. But he was happy to see us when we got back :-)

In other news, he is continuing to be more talkative.  All of the teachers at the day care report he talks to them (he used to only talk to a chosen few).  And he interacts more with the other kids.  A day care highlight:  the teachers drew a hopscotch grid, and he ended up teaching the other kids what to do on it.  Another highlight.  The day care got some new toys including kitchen toys.  And the teachers did not know what some of them were.  Until T showed them what a steamer and buns were for.

Mommy is starting tiger parenting in earnest.  Yes, we thought that was already going on, but now we are looking at future kindergarden, and what it takes to get in.  In particular, we are thinking about getting him in earlier (because he missed the cutoff) so he would be one of the youngest kids in the year instead of one of the oldest.  In the U.S., the cutoff date has been creeping earlier and earlier over the years, because parents have been trying to hold their kids back and entering later.  So this means doing what New York parents all do and prepare the kids for the tests.  (supposedly the tests are cultural neutral tests of intelligence.  After taking a look at some sample questions, I strongly disagree with this assessment.  It is biased towards kids whose parents prepare them to take cultural neutral tests of intelligence.  Because I cannot imagine a four year old understanding these questions unless that child has seen those types of questions before and knows how to answer them. i.e. they have to already know the form of answer that goes with that form of question]. Daddy is slightly amused by the whole thing actually, and has taken advantage of it by buying games.  Starting with dominoes (which are good for matching and counting) and Bananagrams (think scrabble tiles without the board or points).  Since mommy does not play games, daddy thinks he can raise a playing partner.

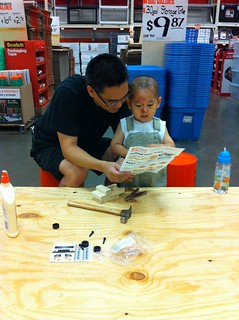
This is how you make a truck
Reading instructions on how to make a truck
The other new thing is going to the Kids workshops at Home Depot and Lowe's.  While they are advertised as for 5 and up, in reality younger kids often go as well.  After much observation of grandpa and daddy over the summer, and practice using Handy Manny and the Melissa and Doug tool box, T can reliably hit a nail on the head with a hammer, which is the principle skill required for these kids workshops.  The only problem is that he does not have the strength for it, so it takes a lot of hits (and daddy is there to finish off the nail).  Between both stores (Home Depot is once a month, Lowe's is twice a month) we figure this means an activity and a toy two weekends a month. :-)

Next month.  Back to school for mommy and daddy.  Lots of time with grandma and grandpa at their new home.  And more talking and interaction at day care.

Thursday, August 22, 2013

Perfect Coffee at Home by Haft & Suarez - Book review

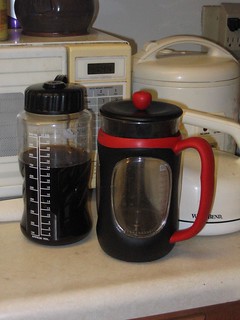
First batch of cold brew coffee
This was written by a couple of retired U.S. Marines who decided they wanted to learn to make good coffee. And write a book. It turns out to be a wonderful exploration into what electronic publishing can be, and a very good example of how to write about preparing food in general. And it has inspired me to try three forms of preparing coffee other than the kitchen coffee maker that is the workhorse of our household.

First the content. The meat of the book are discussions of various ways of preparing coffee: french press, pour over, Moka pot, Technivorm, cold brew, and Aeropress. For each of these, there is a light-hearted narrative on how they learned the method, and several ways of demonstrating it. A detailed set of instructions with pictures, a video, a discussion on how to scale up or down the recipe, and a short form of the recipe (like you would get on a recipe card). Around these are discussions on various aspects of coffee making, light roast vs. dark roast, grinding the beans, the golden ratio of beans to water, water temperature, all with a discussion on how the different choices interact with each other, the method of preparing coffee, and the taste. And a historical quote and jazz to go with it.

Around the discussions of preparation of coffee are two sets of stories. First is the entire culture around drinking coffee, including the market for coffee and the culture of coffee enthusiasts and connoisseurs (and they discuss the difference!) Second is their story. The nice part about this is that their backgrounds are entirely unpretentious, and their essential story is that they only got good because they were willing to be awful. Because the end goal is to enjoy drinking coffee. And that means trying and experimenting to what you want. Their goal in this book is to provide methods, but also teach you where you can change things, and what the effects will be.

Since we had our son, my wife and I have stagnated in tasting food in general. And I have gone from switching between the french press and kitchen coffee maker to using the coffee maker exclusively. In the week since I started reading this, I've decided to pay much more attention to making coffee. And even pulling up old notes on timing my french press, making cold brew coffee, and even the Moka Pot that I have but don't use. And I've enjoyed my coffee, and even the little changes from brew to brew to make it better. My wife has also enjoyed the results, even passing up on the milk she usually adds because the coffee maker tends to make things burnt. Now, the coffee maker is not going to be retired, it has advantages in ease of setup and cleanup, but every now and then I will be wanting to taste my coffee and I'll pull out other things.
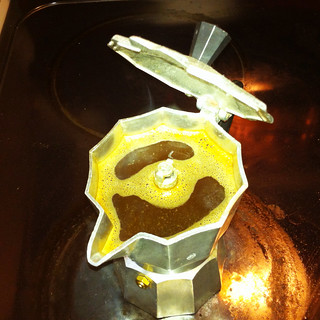
Moka pot on the stove
I think the purpose of a good book about food is not a set of recipes or pretty pictures or passing on knowledge(although these are nice). I think the goal is to inspire you to enhance your enjoyment of eating and drinking. And this book does it in a way that uses the multi-media opportunities of the electronic book format to transmit this in many ways to engage the reader/listener. Oorah!

Note:  This book is currently only available through the Apple iBookstore due to the fact it is the only format the currently allows for the embedding of multiple forms of media.  The book  website is http://www.perfectcoffeeathome.com/.

View all my reviews

Saturday, August 17, 2013

Learning Java 4th ed by Niemeyer: Book review

Learning JavaLearning Java by Patrick Niemeyer
My rating: 3 of 5 stars

I remember using an earlier edition of this book to learn Java many years ago. I even used Java for writing simulations as part of my thesis. Since then, since I generally do scientific and technical computing, I have generally used Python and R linked with C, C++, and Fortran libraries instead of Java. But I have used languages on the Java Virtual Machine (Jython and Clojure) and I probably need a refresher on how the JVM works. This book does give a good overview of all of the scaffolding that goes along with programming in Java, but its focus on the language proper and web and GUI programming in particular leaves me wondering how to get real things done with it.

The first part of the book is what seems to be the standard first chapter of almost all programming books nowadays, a argument of why to use Java. While some things like the safety aspects of the JVM ring true, when he talks about the various dynamic languages he gets some basic facts wrong and mis-characterizes how these languages are used in practice. It would have been better if he did not include these sections at all because he frankly started loosing creditability here. (coming from Python, the general line is that Python is at its best as part of a two language solution, and Java is on the list of likely languages to pair Python with along with C, C++, and Fortran.)

Next are several chapters on setting up your machine to develop and run Java. And several chapters are required. I found many things that I often have to spend several hours looking up whenever I start or deploy a JVM based project so I'm glad that someone realized that this really needs to be in the beginning of an introductory Java book. Things like IDE's, setting up classpath and other environmental variables, and the whole java toolchain. While I applaud that this is required, it somewhat gives a lie to the idea that Java is a simple write one run everywhere tool.

The rest is a tour of the Java language. Data types, statements and expressions, exceptions, assertions, classes and objects. I was specially interested in the discussions on Generics and Threads, as I had not used them before. It could be that I'm spoiled by how Python handles the equivalent of Generics, and both Python and R multi-core libraries, but this seemed very detailed and complex (not helped by Java seeming to require that everything be declared in duplicate).

Despite the title, this felt like more of a reference than a tutorial. Having several chapters on setting up the scaffolding that is needed for every Java project is something that some places seem to gloss over as easy (especially if the IDE does it for you), but makes this book a handy reference. But in the advertise role of learning how to use Java, I'm still skeptical.

Disclaimer: I received a free electronic copy of this book through the OReilly Blogger program.

View all my reviews I review for the O'Reilly Blogger Review Program

Friday, August 02, 2013

Parenting Month 33: So many things for you to talk about, so many ways to sing this song.

I'm going to the museum
'H', 'I', 'S', . . .


One of the side effects of our trip to Chicago to visit a cousin and aunties is that T has become much more verbal.  He has started talking almost constantly (well, except at day care).  There is always something to talk about.  He wants to tell us things.  He tells stories with toys and is generally more expressive.  One cute moment yesterday was he was walking along with a four-year old neighbor and they were trying to compete by reading the letters of road signs.  I think the everyone in one block in every direction could hear them reading off letters.  The other aspect is that he is starting to get a little more creative.  He is starting to make up stories of things that his toys do so he is talking about more than what he wants to have (although he still does that, after all, he is a two year old).


New Fangled (AKA Toddler) Saw Bench
This workbench is just right for me
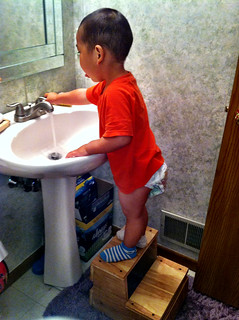
As grandpa and dad have been building projects around the house, T has been the beneficiary.  The sawbench is just the right height for him to use as a workbench (and there is always a handy tape measure for him to measure things with.  Left over dowel pieces and blocks of wood have turned into a hammer and some wood for him to hammer.  A step stool has given him enough reach that he can get high enough over the sink to reach the faucets and to see what he is doing when washing hands by himself.  And the whole garage is a real life version of his beloved Handy Manny cartoon.


I can wash my hands by myself.
I can wash my hands without any help.
Another thing he has started is singing.  Before it was isolated words that he could get in at about the right time.  Now, he is recognizably singing entire songs.  Not good for a performance yet, but we can tell the melody and tone patterns of what he is trying for even if the lyrics are jumbled.  Of course, he only does this at home, so the day care staff tell us he does not join in.  But what I think is happening is that when the staff are singing, he does not sing, because he is studying them.  He does the same thing when videos are playing, he studies the video, then he can repeat it on his own later.  But someday, he is going to have to learn to perform around others.

Sunday, July 14, 2013

A two-step step stool

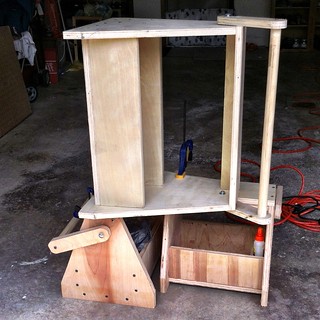
We had some plywood left over after the small scale handyman totes (largely because the big box home center gave us another piece after botching the cutting so badly).  So I decided to something quick and dirty.  A step stool.  My son is not quite tall enough to use the faucet in the main floor bath room.  There is one step stool we have that can get him up, but it is too high for him to step up to it.  Solution, build a two-step step stool.  I laid out a plan based on one from Ana White.  Goal:  Make the step stool, but keep everything within the plywood sheet we have.

Keeping it within the plywood meant that it could only be 12 3/4" high (12 inches because both sides have to fit inside 24", the 3/4" comes from the width of the plywood).  Two 6" deep steps, and roughly 12" wide (based on the need to get both the steps and the supports out of the same 24" wide piece of plywood).


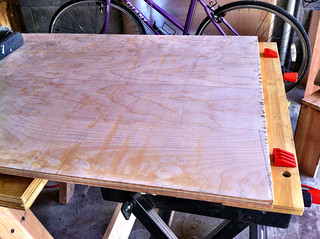
Layout the wood
Laying out the cuts

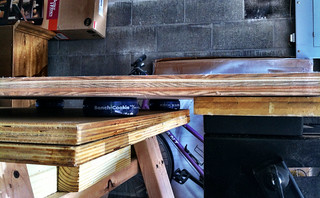
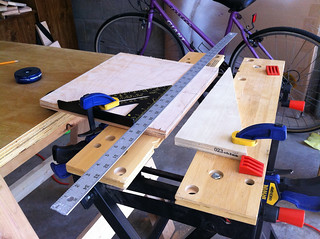
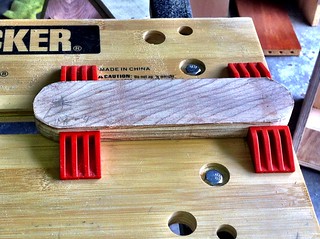
The key for cutting something this large is to make sure both sides of the cut are supported.  So I used my workbench on one side and the Black & Decker Workmate on the other.  However, the workbench is actually sized to fit me, which means it is a little shorter than the Workmate.  But by using a set of bench cookies (from Rockler) and raising the Workmate slightly I had it roughly equal heights on both sides of where I was going to cut.

Using bench cookies to get the level right
Supporting the wood on both sides

I don't have a table saw or a circular saw, so I was using a jigsaw, which is really not suited for long cuts.  I used a metal ruler to be my guide.  So each cut started out with me placing the jigsaw, the guide next to it, then my combination square to get the metal ruler going straight across the board.  I then clamped down the ruler and made the cut by having the jigsaw follow the guide.

Setting up a cut for a jigsaw
Cutting the board using a guide for the jigsaw
The cuts were supposed to be the hard part.  Especially since jigsaw blades are known to wander around on long cuts so while the cut may be straight at the top, the unsupported bottom is moving around so the cut is usually not straight all the way through.  But with a step stool, the next part is attaching the legs to the supports and the steps.  And getting started was a trick.

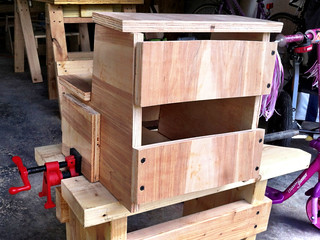
I started by attaching the stretchers to the sides.  First I clamped one side in the Workmate so that the back was exposed and level with the Workmate surface.  This let me attach the sides to the back of the Workmate.  Next, I used my sawbench and pipe clamps to hold one side of the stool while attaching the stretchers to the other side.  My cross cuts for the stretchers turned out pretty bad, while my rip cuts on the sides were pretty good, so I aligned the stretchers using the sides, and ignored the fact that top and bottoms of the stretchers were messed up.

Supporting sides up while driving in screws
Supporting step stool side with the pipe clamp on the sawbench
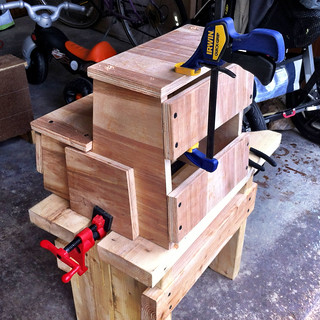
After the sides, then came the steps.   Now, the jigsaw is pretty bad about making straight, square cuts, but it turns out that in this design, the sides are not vertical either.  So, of my two steps, I looked for the one with the edge that slanted just like the step cuts and made that the bottom step.

Putting on the steps
Now to attach the steps.

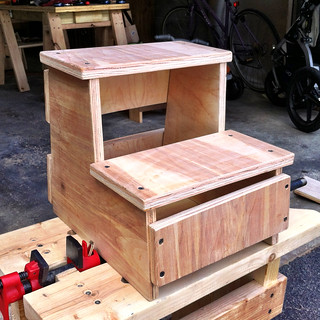
So now I have an assembled two-step step stool.  After this, I used a rasp, then file, then sandpaper to round off all the edges.
Two step stepstool assembled!
Assembled step stool
Next step is to finish the wood.  I'm going to put on Danish oil, because that is what I have lying around, and let that sit overnight.  Then we get to see if T uses it.

Some room for improvement.  The original plans have the supports in between the legs, not attached to the ends.  Maybe if I have time someday I can take out the supports and re cut them (they are pretty messed up) and do this the right way.

Saturday, July 13, 2013

Python Cookbook, 3rd edition by Beazley and Jones - Book review

Python CookbookPython Cookbook by David Beazley
My rating: 5 of 5 stars

The third edition of Python Cookbook is part of what seems to be a general trend of issuing new editions focusing on Python 3. For me, whose focus is on data analysis and technical computing, this is the time to be thinking about the change from Python 2 to Python 3 as the base libraries of Numpy, Scipy, Matplotlib, and iPython have been ported, and the various other libraries I use that depend on these are being ported as well. But this edition is not just porting the old cookbook, it is a complete rewrite to go with the big shift that was Python 2 to 3. Because a lot of what I used the old cookbook and many of the recipes at the ActiveState website was for handling issues related to crossing versions (I had some projects with Jython, which was several versions behind CPython) and ways of getting around issues that are purportedly solved in Python 3. For that the third edition of Python Cookbook fills its purpose of showing idiomatic ways of performing some programming tasks, and being a reference for how to do thing well and elegantly taking advantage of the language and libraries, not fighting it.

I focus on using Python as a data analysis platform. So I generally only learned as much of the language I needed to in order to use the scientific stack of Numpy, Scipy, Matplotlib, Pandas, and the libraries that were built around them. But that means that I have not gotten to know large portions of the standard library. And introductory books don't cover this either, they focus on using the language itself. There are also a large number of books and references that focus on Python as a web development tool or a system administration tool, so those parts of the standard library get a lot of coverage in teaching materials. But the rest you almost have to stumble upon. In ideal conditions, the way you would learn about much of the standard library is to have someone who was more experienced nearby show you what you needed to know, as she demonstrated methods in her code that did the things that you never learned in class. But sometimes there is no such person. The Python Cookbook plays this role, of demonstrating how to do things in Python 3 that are practical and you probably would not learn while learning the language itself.

Some areas that I found useful are the heapq, generators, and the I/O. heapq is a module and data structure I just never got around to learning. Usually discussions about Python data structures made their way to deque and heapq was discussed by reference. But after looking at the priority queue discussion, I fired up an iPython notebook and went through every recipe that used heapq and I've started thinking about how to rewrite a model I recently coded up. Generators and File I/O are areas that I knew in passing through my use with them in data analysis, but Python Cookbook opened up new ways of understanding (I am starting to get why JSON is so useful). Now, there is nothing special about these, but seeing these parts of the standard library in use in an elegant way is something beyond what you would get from a module documentation or a standard tutorial.

I do miss the introductions to each chapter that was in the 1st and 2nd editions of Python Cookbook. But what Python Cookbook does give is an idiomatic feel of using Python3, when there are not all that many mentors out there to go around. So this is something very useful for others who are starting to use Python 3. It is not for learning the language, but it is for using the language well.

Disclaimer: I received a free electronic copy of this book as part of the Oreilly Bloggers program
I review for the O'Reilly Blogger Review Program
View all my reviews

Sunday, July 07, 2013

My version of the New Fangled Sawbench

We have a few projects going around the house. One thing I've noticed is that my father-in-law does not use the workbench. He sometimes uses the Black & Decker Workmate for some detail sawing, but he uses some small stools he made up when doing any major cuts. The issue is that the workbench and workmate are too high for doing hand work. Enter the sawbench.

The modern advocate for sawbenches is Christopher Schwartz at Popular Woodworking Magazine. An he has many iterations on sawbench design and use at that site.

The purpose of a sawbench is for using handsaws. To do this properly, you need to be able to use your weight to hold the material steady and to cut. And the traditional workbench that is about wrist high is really for planing and power tools and is too high for this. The sawbench should be about knee high so you can kneel on top of material on top of the workbench. In addition, some designs have a notch at the front for use when ripping boards (cutting with the grain). Some have a slot in the middle for supporting pieces on both sides. Some have splayed legs, others straight. I choose to use a design from the Timber Frame Tools blog, which is based on a design at the Dan's Shop blog. This version is made up of 2X6s (with 2X4s for stretchers). I liked the idea of straight (thick) legs, so I could use it as an actual sitting bench as well. And I have not gotten to the point I could cut good mitres with any degree of accuracy.

I got a 10' 2X6 from the local Lowes, and they cut it down for me. I was going for 24" top, and 17" tall. The height was based on me going around the house and kneeling on chairs until I found one that seemed to be the right height for kneeling, with allowances for shoes and some material thickness. The length was based partly on the fact that I needed everything to fit in a 10' board, and by the fact that this is going to have to live underneath my workbench and the workbench top was 24" deep.

Step one is to make the legs. Each leg is made of edge glued 17" 2x6s. There is a notch in the bottom of the legs to help with stability (I don't think there is any flat-level surface in the house, the space here helps keep the rocking under control.) In addition, I cut notches where the top will go, with a spacer in the middle. The slot in the spacer will have a 1/2" pipe clamp, to serve as a vice.
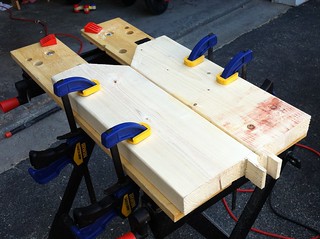

Glueing legs together

Next for the legs is to cut some notches for the stretchers. One option is to put the stretchers up against the top. I chose to put them a couple inches below so that I would have some room for clamps in any direction along the top.
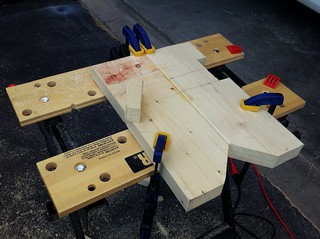
Notches in legs for stretchers

Next to work on the top. The boards were somewhat cupped, so I (and my father-in-law) spent some time planing them smooth. I put a notch in the top as well. While I could say that it is for ripping wood, the real reason is that I found a split in one side of the top, and cutting out the notch to get rid of the split.

Now that the pieces were all cut, time to put everything together. First the stretchers. The notches were good enough so that they fit in snug, and I could test the placement. The stretchers were sized to be a 2x4 we had laying around cut in half, so 19". I made it so that it was about 1" behind the notch in the front, and 2" from the back. These were then put in with glue and then I screwed them in. Next was the top. Since the notch for this was sized, this was glued on as well. For this, I wanted the glue to harden before screwing them in. (I did not worry about the stretchers because the fit was so tight the screws were not going to knock them out of alignment.) Then I clamped everything together with speed clamps and a pipe clamp.
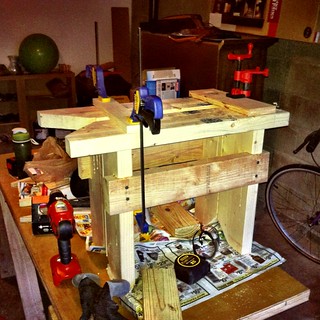
Glueing on the top

The next day, I put in screws help hold the top to the legs.  First, I used a 1/2" spade bit to make a well for the screw (to keep the screw head below the top of the bench).  Then used the cordless drill to drive in the screws.
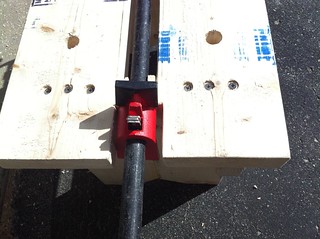

Pipe clamp and bench dog holes

Last step, I put in two pairs of bench dog holes. These are to work with the pipe clamp to serve as a vice for holding material. (something I have not put onto my workbench) I rather like the pipe clamp trick. The idea is what is usually the backside can rotate in any direction, so you use the clamp side to hold onto the workbench and the back side to hold the material (or the reverse). The bench dogs can also be used to hold material against the clamp. The pipe clamp I got already had padding, so a wood block is optional. (or if I want a wide surface to clamp with)
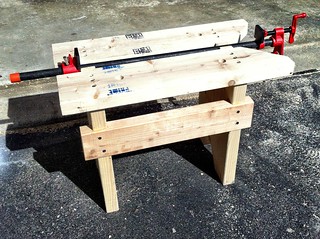
Finished sawbench

At the Timberframe Tools site, he gives this an alternative name as the "Toddler's Workbench", because it looks like a small version of a real workbench (straight legs, bench dog holes) so his son can play with it. So does mine :-)
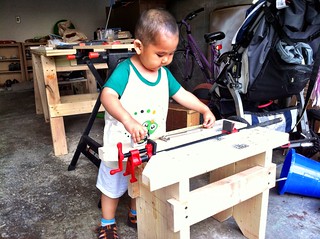
New Fangled (AKA Toddler) Saw Bench

Some things for next time around. I need to learn how to cut notches the long way through lumber. It would be better if the top had a slot so that it was seated in the legs so there is wood providing lengthwise support, not only glue and screws. Also, I messed up the slot in the middle. I needed it to be the width of the clamp housing, not the with of of the clamp (or of a board which was used in the original design). I got it to work by going back and making the slot wider, but I could have used that width to make the pipe holder slot stronger. I'll probably stain it with Danish oil. And after I've used it a few times with bench dogs, I may put in another pair or two of bench dog holes. But I'm happy with this one.

Friday, July 05, 2013

Scaled down versions of the Handyman tool tote

The tool-tote (plans at the Handyman club) I had made a while back had one problem, it was big.  The reason it is big is to have an 18" box, which is big enough for most full size hammer.  In addition, it was trying to get the top high enough so that you can use it as a work surface where you can kneel on a board on the top while working with it.  And that means it has to be wide enough to be stable.  All that means that my wife won't use such a thing.  So we're giving it to my father-in-law, who needs a tool box and a stable work surface, and I'm going to make a couple more smaller versions for us.

Completed tool tote / sawhorse
Looking at the scrap, I figured out how a layout where I could make two boxes with the leftovers from this and the workbench and a single 2' X 4' piece of plywood.  So my wife goes to get the plywood.  And the guy who was helping her completely mangles the thing.  I had a layout so that if you made four 12" x 12" boxes in a square pattern on one half of the board, you would use the remnant that would be slighly less than 24" x 24" for the rest and there would be waste at the end.  Instead, he decides to make 12" boxes straight across the long way.  And he was using a board that was 24" wide, but 47 1/2" across, so that means that the last board would be 12" wide, but significantly less than 12" long.  And it also means that the rest of the pieces would be hard to cut out.  (big box stores generally don't mind doing cuts in plywood and lumber as long as they are straight through cuts)  This meant that I had to do some tinkering with the design to make it work with the cuts he gave us.

So, basic idea is to make two bins.  Both 12 3/4" high  (12" + the width of a plywood topshelf).  And the other dimensions whatever would work.  In particular I ended up having one top be 4" wide and the other 5" wide (the original goal was to have them both 5" wide).  And the box would be 12" long (instead of 13") and 8" across.  Because the top piece was across the top of the sides, it would actually be quite stable and strong (i.e. you could stand on either one without worry).

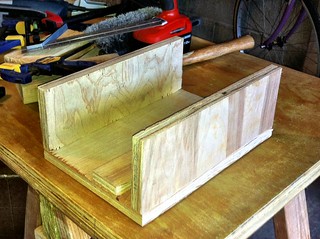
Box for the tool tote

This time was much smoother, the benefit of having done this before, and now I have a few more clamps and other tools that I've been accumulating while doing other projects.  And my general skill level with measuring, layout, and cutting has been improving.

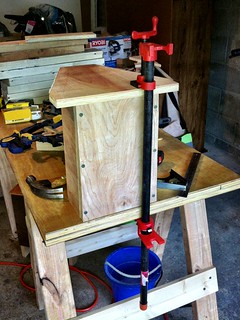
Using a pipe clamp to hold the sides for screwing in

After the box is put together, next came the handles.  This worked well the last time, so this time with four handles to make it was practically a production line.  The Workmate acquitted itself nicely again to hold the handles for both rounding the handles as well as making the necessary holes for the bolt and the handle dowel.

Making the handles on Black & Decker Workmate

Finally the completed project.  It is incredible what a difference 2/3 scale makes.

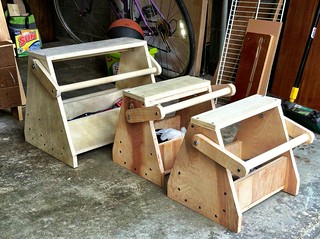
Tooltotes next to full size model

And the reason for doing two of them:  so that I have the equivalent of two short sawhorses.  In this case I wanted to cut out a notch on the bottoms of the original version so that it be less prone to rocking on non-smooth surfaces.  Normally this would have been a problem because the handle would get in the way of putting it on my workbench top.  But with the tool tote/sawhorses I could lay it across the two of them and clamp them so I could work.

Scaled down tool totes in action

So now, we're passing on the original to my father-in-law so he could use it as a tool storage and a small workbench, and we have two short boxes. My wife is using hers for paint and gardening stuff.  I'm using mine to store measuring things.   A nice quick project.

Thursday, July 04, 2013

Interactive Data Visualization for the Web by Scott Murray: Book review

Interactive Data Visualization for the WebInteractive Data Visualization for the Web by Scott Murray
My rating: 4 of 5 stars

This is really a d3.js (Data Driven Documents) book, since the entire book is about using the d3 Javascript library for data visualization. For me, coming in with a background in data analysis but no practical Javascript background, this provided a good overview of many Javascript/web concepts required then the d3 library.

My background in data visualization is R (ggplot and lattice) and Python (Matplotlib). I find Excel too limiting and Matlab inflexible. But what I'm used to are descriptions of visualizations that are then implemented. d3 is different, it makes you specify the form of the visualization and makes you work at a very low level (which is what ggplot and Matplotlib are trying to avoid). But this provides room for great creativity, and learning how to do this is the point of this book.

This book does a good job of introducing enough of the background technologies of Javascript and the web to make d3.js useful. This was always the reason I never got around to actually using Javascript, I never learned all the things you needed to know to make it useful. For example, I now think I understand JSON well enough that I can see using it as a data store for data frames instead of CSV or SQLite or pickles (Python).

I come at this as someone who already does data analysis, but may need more ways of delivering the products of the analysis to others. And this has promise as a means of this delivery through a browser, which is already comfortable for most. And this book does a good job of working both the subject of d3.js and the web ecosystem that it is a part of to get to someplace useful.

Disclaimer: I received a free electronic copy of this book as part of the O'Reilly Blogger Program

View all my reviews at Goodreads.

I review for the O'Reilly Blogger Review Program

Monday, July 01, 2013

Parenting Month 32: Learning from elders

Two events this month.  We had our regularly scheduled grandparent line change where my mom left and S's parents came in for their long shift.  And we went on vacation!

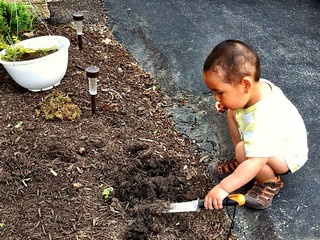
This month was about learning by observation.  The Handy Manny phase is still going strong, and with him watching ye-ye (grandfather, yes, he gets the wrong one but it is the spirit that counts) and I make things.  It is really funny how he gets some real particular details just right (making motions of using pliers to hold nails for the first few taps, measuring out wood with a tape measure, turning screwdrivers).  He has also figured out that the power tools take the place of certain hand tools, but they have him a bit of a loss (he does not have any power tool toys).  Same with gardening as we have started a garden now that the frost has ended.


I wonder if there are any worms in here

But the real imitation comes from other kids.  Kids at day care.  And especially on vacation.

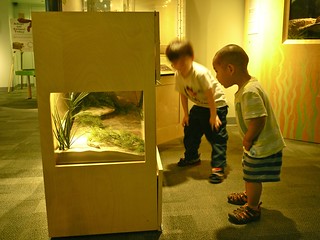
Our trip this summer was back to Chicago.  And T got to play with his cousin P' J. We had one day where we took  J and T out to play at a playground, then we took him to the Peggy Notebaert Nature Museum in Lincoln Park, Chicago.  There was a water exhibit to demonstrate the workings of rivers, irrigation, locks and dams.  The animal exhibit with live snakes and turtles.

Look, there is a snake in here

The winner was the butterfly garden.  Both J and T were pointing in every direction yelling "look! look!"


P1060036

P1060029

And like a proper museum whose serves children, there was an area for the kids to burn energy.  T likes following J around (J is 2 1/2 years older).

I can see you!

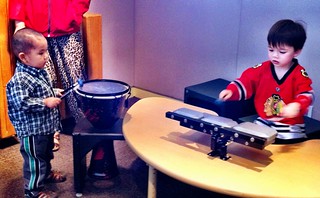
We also went on another day to the Kohl's Children's Museum in Glenview.  And J and T even played drums together (J being the leader giving the count, since he is the experienced drummer of the two)

The cousins drum section

While this was a lot of fun for J to play being the big brother, this seemed to get old as our visit went on.  You can tell J was trying to make sure he was getting attention as he was talking near constantly and making sure we were paying attention to him.  It is not as hard as if there were two older kids who each want to have their own conversation topic as T does not really care what kind of attention he is getting as long as he is getting some.  And eventually, J started getting possessive of his toys and not wanting Nong T to play with them.


Cousins playing with blocks together

But T loves being around J.  T likes to express how happy he is by giving a roll call.  "Mommy and T", "Daddy and T", "Mommy and Daddy and T!".  Or an especially happy time is "Mommy and Daddy and Lau-Lau (grandma) and Ye-Ye (grandpa) and T!"  During this visit, J was added to the roll call  "Mommy and Daddy and J and T!"

Of course, there are other habits to pick up too.  Trying to whine and bargain like J.  We had lunch with four year old N and N taught T how to stick out his tongue.  And general screaming while running around in the house (we have to remind him 'no screaming - - - inside')

This is another fun trip to Chicago.  Running around the city with family.  Visiting old friends and experiencing new places.  And even the traditional running into random person along the way :-)

Thursday, June 06, 2013

Beyond Dinocalpyse by Chuck Wendig: Book review

Beyond Dinocalypse (Dinocalypse Trilogy, #2)Beyond Dinocalypse by Chuck Wendig
My rating: 4 of 5 stars

Beyond Dinocalypse is a surprisingly engrossing tale. Surprising because for a pulp book, it spends so much time with its main characters in despair. For readers of the first book, the beginning is surprisingly dark. And it makes the characters grow over the course of the book leading me to be genuinely cheering for them at the end.

The key of pulp is hope and confidence. The heroes of pulp are expected to be competent characters, able to apply their will and abilities to whatever the world throws at them. So it is a surprise to see the book start of a world of defeat, with one of our main characters cynical and on the verge of defeat, both personally and the world our heroes fight for.

This gulf between what is expected and how Beyond Dinocalypse begins leads to a lot of room for character development. We have heroes and villians interacting with each other and their relationships evolve as each has their own goals and vision for what is best for themselves and the future they want to see.

This is a great second book of the series. The many facets of each of the characters, even the secondary characters, that comes out as they interact with each of the others was surprising for something that I thought would just be fun, mindless reading (not that there is anything wrong with that). Highly recommended.

View all my reviews

Saturday, June 01, 2013

Building the Handyman Club tool-tote

The first real project was the tool-tote found at the Handyman club.  It was supposed to be a combination tool-tote and workbench/stool/sawhorse.  I figured it would be something S could use for gardening (since we don't have any organization for gardening stuff).  And a toolbox is high up on the list of early wood working projects (along with a sawhorse and workbench)

I got the plywood and the wooden dowel from Lowes.  (the rest of the plywood became the workbench top discussed in an earlier post.)  They cut it into rectangular pieces (which accounted for most of them.  I have to do any shaping, such as for the sides and rounding the handle brackets (and putting in holes for the handle to fit into later.

Cut and shaped plywood for the tool tote. The paint bottles were to size the box later.  One compartment was to be sized to fit those cans.

First, was the box part of the tool tote.  In addition to the base, there were two sides and a divider to put in. Using the vise part of the Workmate workbench, this was pretty straight forward.  Only complication was adding in the divider.  Because the divider was sized to be the attachment of a lid made up of plywood, I used two scrap pieces of plywood to brace the sides and the divider was just the right height.


Next was adding the box to the sides.  This is where it helped that my earlier project was to build a workbench.  One side of the workbench became an assembly area and the other half became a tool storage and part layout area.  The Workmate was for sawing and power sanding.  One problem here was putting everything together.  The plans called for 1 5/8" Deck screws.  But when they had to go in a piece of plywood on a 3/4" edge, sometimes the plywood would split.  Especially when countersinking the screws.

The main part of the tool tote. You can see the Workmate in the back set up for cutting a wood dowel handle.

The other difficult part was the handle.  First, the 1" dowel was just a little too large for the whole that I made using a 1" spade bit.  Not much of a problem, I took a file and filed down about an inch of each end.  The other mistake I made was where I located the brace.  It was offset from the center because I needed to make room for the handle.  But because this deck screw was going into the narrow part of the plywood, it did not want to countersink in.  So I had to move the brace to be far enough from the handle that it would not interfere with the handle rotating.

Completed tool tote / sawhorse

This tool tote was very solid.  I got up and stood on it and it did not even think of moving.  The result of building something using screws and plywood instead of tacks and particle board.  And it was designed to double as a sawhorse style workstool, so it turns out it is pretty big (18" long, 16" high).  So it may not be my wife's garden tool caddy after all.  We'll find a use for it. It may go to my in-laws when they move.

The point of starting out by making things like sawhorses, workbenches, and tool caddies is to practice skills.  I've never done stuff like this before, other than the occasional kit. And I've never really used power tools before.  Now in addition to the cordless screwdriver/drill, we have the oscillating multi-tool and a jigsaw.  And we added a number of new bits for the drill and I'll be looking at more blades for the multi-tool and jigsaw so we can handle 2x lumber in addition to plywood.  Skills are another area of growth.  I got a lot of practice with the combination square and speed square, and use some tips and techniques that were part of YouTube videos.  Also learned some of the limitations of the jigsaw and multi-tool (part of it was that I only have a limited number of blades) and my jigsaw skills in particular have improved over the three projects.

Next steps, inventory the scrap lumber and plywood to see what else I can make :-)